Do You Need an Egress Window to Finish Your Basement? What Columbus Homeowners Should Know

If you’re finishing a basement in Columbus, you only need an egress window if you’re adding a bedroom. Ohio’s residential code doesn’t require one just because an existing basement is being finished, but every new bedroom or sleeping area has to have its own emergency escape opening that meets minimum size and safety standards.

Newly built homes work a little differently. A new basement needs at least one egress opening from the start, unless it’s used only for mechanical equipment like a furnace or water heater and is 200 square feet or smaller.

What Ohio Code Actually Requires

Ohio’s building rules for one- and two-family homes come from the Residential Code of Ohio, which follows the International Residential Code’s Section R310, commonly known as the “emergency escape and rescue” provisions. The core rule is that basements, habitable attics, and every sleeping room need at least one qualifying opening that a person can climb out of unassisted, and that firefighters can climb into if needed. For an existing basement you’re finishing, that requirement is triggered when you create a new sleeping room.

This is a life-safety rule. A below-grade room with only one way out, the stairs, is dangerous if a fire or smoke blocks that stairwell, so code treats the egress window as the backup exit.

A few practical points worth knowing:

  • It applies per room. If you’re finishing two bedrooms downstairs, each one needs its own qualifying opening. You can’t rely on one window serving a room down the hall.
  • “Bedroom” is about function, not the label on the floor plan. Code cares about how a room functions. A “flex room” or “guest suite” with a closet and a bed in it reads as a sleeping room to an inspector.
  • You generally don’t need two exits from one bedroom. A common myth is that every basement bedroom needs two separate ways out. In most cases, one code-compliant egress opening per room is enough, as long as it meets the size and access requirements below.

Basement Egress Window Requirements: The Basics

The dimensions below are the general framework under the Residential Code of Ohio’s R310 provisions. Because code can be amended and local building departments sometimes apply their own interpretation, always confirm current numbers with your contractor or the local building department before finalizing window sizes.

  • Minimum net clear opening: 5.7 square feet in general, with an allowance of 5.0 square feet for grade-floor or below-grade openings, which covers most basement windows.
  • Minimum clear opening height: about 24 inches.
  • Minimum clear opening width: about 20 inches.
  • Maximum sill height: the bottom of the opening generally can’t sit more than 44 inches above the finished floor, so a small child or an unassisted adult can actually reach and climb through it.

The tricky part is that all of these have to be satisfied at the same time. A window can meet the width and height minimums individually and still fail if the net clear opening, the actual space you have to climb through once the window is open, doesn’t add up to the required square footage. This is why a “regular” basement window, even a decent-sized one, usually doesn’t qualify as an egress window without modification, and why an existing window opening sometimes has to be enlarged (cutting into the foundation) to bring it up to code.

Window Well Requirements

Because most basement windows sit below grade, they need a window well outside to make the opening usable as an exit. General requirements include:

  • A minimum floor area of roughly 9 square feet, so a person actually has room to stand and climb.
  • A minimum projection of about 36 inches out from the foundation wall.
  • A permanently attached ladder or steps if the well is deeper than about 44 inches, positioned so it doesn’t block the window opening.
  • Drainage that keeps the well from filling with water, which matters a lot in Columbus’s clay-heavy soil and wet spring weather.

Ladders, covers, and drainage are easy details to miss if you’re only thinking about the window itself, but they’re part of what an inspector checks before signing off.

What Happens If You Skip It

Finishing a basement bedroom without a compliant egress window creates problems that show up later, usually at the worst possible time:

  • The room can’t legally be called a bedroom. Appraisers and real estate listings rely on egress compliance to count a room as a bedroom, so a basement “4th bedroom” without one can turn into a liability at resale.
  • You risk failing inspection. If your project needs a permit, and most basement finishing projects do, an inspector will check for egress before signing off on a new sleeping room.
  • Retrofitting later costs more than doing it right the first time. Cutting a larger window opening into a finished, drywalled, painted room means undoing finish work you already paid for.
  • It’s a real safety gap. Below-grade rooms without a second way out are genuinely more dangerous in a fire, which is the whole reason the rule exists.

How Egress Fits Into a Basement Finishing Project

Egress is exactly the kind of detail that’s easy to overlook when you’re focused on flooring, paint colors, and layout. DC Homes flags this directly as one of the most common basement finishing mistakes: overlooking permit and egress requirements before the walls go up. It’s a lot easier to plan for an egress window during the design phase than to discover the problem after drywall is hung.

If you’re weighing whether your project counts as a simple finish-out or something more involved, like adding a bedroom or a bathroom, it’s worth reading through Basement Finishing vs. Basement Remodel: What’s the Difference, since egress requirements are one of the things that can push a project from one category into the other. And if you’re already thinking about insulation and moisture control alongside egress, our Basement Insulation Guide for Columbus Homeowners covers the other big planning consideration for a Columbus basement.

Frequently Asked Questions

1. Do I need an egress window if my basement doesn’t have a bedroom?

Usually not, if you’re finishing an existing basement. The code Ohio follows doesn’t require a new egress opening when an existing basement is altered or repaired, unless you create a new sleeping room. Newly built basements are different and need at least one egress opening, unless they’re used only for mechanical equipment and total 200 square feet or less. If a room could end up being used as a bedroom, it’s smart to plan for egress now rather than retrofit it later.

2. Can I use my existing basement window as an egress window?

Sometimes, but usually not without changes. Most standard basement windows are smaller than the required net clear opening, so the existing opening often has to be enlarged, or the window swapped for a compliant egress unit, to meet the size and sill height requirements.

3. Is my basement grandfathered in if it was finished years ago without an egress window?

Often, yes, for the finish work itself. Older finished basements that predate current code aren’t automatically forced to be brought up to today’s standard just because code has changed. But if you’re doing a renovation that touches that room, especially adding or formalizing a bedroom, it typically triggers the current requirement.

4. Do I need a separate egress window for every basement bedroom?

Yes. Each sleeping room needs its own compliant opening. One egress window can’t serve two separate bedrooms down the hall from each other.

5. Are permits required for adding an egress window?

Generally, yes. Adding or enlarging an egress opening involves cutting into the foundation and often excavating for a window well, which typically requires a permit and inspection. Requirements can vary by jurisdiction, so check with your local building department or have your contractor confirm before work starts.

Planning a Basement Finishing Project in Columbus

Egress is one piece of a bigger planning puzzle that includes moisture control, insulation, lighting, and layout. Understanding basement egress window requirements before you finalize a floor plan saves you from a redesign later. If you’re ready to talk through what your basement needs, reach out to DC Homes for a consultation, or take a look at our basement finishing services to see how we approach these projects from the first walkthrough to the final one. Getting egress right from the start keeps your project on schedule and makes sure every bedroom you add is safe and up to code.

Basement Insulation Guide: What Columbus Homeowners Should Know Before Finishing

Basement insulation is one of those decisions that’s easy to treat as an afterthought, something the contractor handles while you’re picking out flooring and paint colors. That’s a mistake. It’s one of the few choices in a renovation you can’t easily undo once the drywall is up, and getting it wrong in a Central Ohio basement can trap moisture behind your new walls, causing problems you won’t see until they’re expensive to fix.

Here’s what actually matters before that decision gets made.

Why Basement Insulation Matters More in a Columbus Home

Columbus sits in IECC climate zone 5A, the same cold, humid zone that covers most of the northern half of Ohio. That matters for basement insulation specifically because a Zone 5 basement wall spends most of the year in contact with cold, damp soil on one side and a heated living space on the other. Without the right insulation, that temperature difference shows up as cold floors overhead, a furnace that runs longer than it should, and condensation forming on interior surfaces once the space is closed in.

We’ve written before about how Central Ohio’s clay-heavy soil and freeze-thaw winters put pressure on foundations and basement walls. The same conditions that stress a foundation also mean a basement here holds more ambient moisture than a basement in a drier climate, which is exactly why the insulation material you choose matters as much as whether you insulate at all.

What Columbus Building Code Actually Requires

Ohio follows the IECC, and for climate zone 5, the energy code sets a specific bar for basement wall insulation: R-15 continuous insulation, or R-19 in the stud cavity, or a combination of R-13 in the cavity plus R-5 continuous. “Continuous” means an unbroken layer of insulation across the wall, uninterrupted by studs; “cavity” means insulation installed between the framing.

Code also requires a thermal barrier, typically half-inch drywall, over foam insulation before the space is occupied. This isn’t optional, and it’s one of the items an inspector will check during the permitting process that any legitimate basement renovation in Columbus and the surrounding suburbs goes through alongside framing and electrical.

If you’re weighing whether a basement project needs permits at all, it does, and insulation is part of what gets inspected.

The Insulation Materials That Actually Hold Up Below Grade

Not every insulation material belongs in a basement, and this is where a lot of DIY basement projects go wrong.

Rigid foam board (XPS or EPS) is the standard choice for basement walls, and for good reason. It doesn’t absorb water, it delivers a consistent R-value per inch, and it can be installed directly against concrete without trapping moisture behind it. XPS runs a bit higher in R-value per inch than EPS, but both perform well in a basement application.

Closed-cell spray foam insulates and air-seals in a single step, which makes it a strong option for basements with irregular stone or rubble foundations where rigid board doesn’t sit flush. It costs more and requires professional application, but it conforms to uneven surfaces in a way rigid foam can’t.

Fiberglass batts should never go directly against a concrete basement wall. Fiberglass absorbs and holds moisture rather than shedding it, and in a below-grade application that means mold risk inside a wall cavity you can’t see once it’s closed up. If fiberglass is used at all in a basement, it belongs in the stud cavity in front of a moisture-resistant foam layer, never touching the concrete itself.

One more detail that trips people up: basement walls generally should not get a polyethylene vapor barrier on the warm side, the way an above-grade wall might. In a basement assembly, that traps moisture rather than managing it. The right vapor control depends on which insulation method is used, which is exactly the kind of detail worth getting right the first time rather than fixing after the drywall goes up.

Moisture First, Insulation Second

No insulation material fixes an active water problem, and insulating over one just hides it. Before any insulation goes in, the basement needs to actually be dry, meaning exterior grading directs water away from the foundation, gutters and downspouts are doing their job, and there’s no active seepage through the walls or floor. If there’s any question about moisture, that gets addressed and given time to dry out before insulation and framing start, not after.

This is the same groundwork we flag for anyone finishing a Columbus basement, insulation included. Skipping it is the fastest way to turn a finished basement into a problem instead of an upgrade.

The Spot Most Basements Miss: The Rim Joist

The rim joist, the band of framing where your foundation wall meets your first-floor framing, is one of the biggest sources of heat loss in a basement, and it’s the part most homeowners forget entirely when they think about “basement insulation.” Every stud cavity along that band is a direct path for outside air. Sealing and insulating the rim joist with cut-to-fit rigid foam and spray foam around the edges is a small job compared to insulating the full basement, and it closes a gap that a lot of finished basements never actually address.

DIY vs. Hiring a Pro for Basement Insulation

A small, straightforward section, like sealing an accessible rim joist, is a realistic DIY weekend project for a handy homeowner. Insulating full basement walls as part of a finishing project is a different scope. It touches moisture management, framing, the electrical rough-in, and a code-inspected thermal barrier, all of which need to happen in the right order and pass the same inspection as the rest of the renovation.

That’s usually the point where it makes more sense to have it handled as part of the larger basement finishing project rather than as a standalone DIY task, especially if the basement is also being framed, wired, and finished at the same time. Sequencing it separately from the rest of the renovation is how homeowners end up redoing work.

Frequently Asked Questions

1. Does basement insulation help with moisture, or cause it?

Done right, with the correct material and vapor control, it helps by keeping the wall surface warmer and reducing condensation. Done wrong, with fiberglass against concrete or a vapor barrier in the wrong place, it traps moisture and makes things worse. The material and the order of operations both matter.

2. What R-value do I actually need in Columbus?

Under the energy code for climate zone 5, basement walls need R-15 continuous insulation, R-19 in the cavity, or R-13 cavity plus R-5 continuous. Your specific wall assembly determines which path makes sense.

3. Can I insulate part of my basement without finishing the whole thing?

Yes. Insulating a mechanical room or storage area still helps with energy efficiency and comfort even if you’re not finishing it as living space, though the code requirements that apply are more specific once a space is being finished for occupancy.

4. Does insulation need a permit?

Insulation itself is typically inspected as part of the broader permit for a basement finishing project, framing, electrical, and insulation all get checked together rather than as separate standalone permits.

5. How does insulation fit into a full basement renovation?

It’s one step in the sequence, after moisture is addressed and framing is up, before drywall goes on. It’s easiest to plan and budget for as part of the overall basement finishing project rather than as a separate add-on.

Get Your Basement Insulation Done Right the First Time

Basement insulation is one of those details you only get one real shot at. Once the drywall is up, checking whether the right material went in, in the right place, with the right vapor control, means opening the wall back up. If you’re planning a basement renovation in Columbus, Dublin, Upper Arlington, or anywhere else in Central Ohio, DC Homes handles insulation as part of the full project, sequenced correctly with moisture management, framing, and the inspections that go with it.

Request a quote or call us at (740) 827-3410 to talk through what your basement needs before you finish it. And if you’re still deciding what to do with the space once it’s insulated, take a look at our guide to finished basement ideas for Columbus homes.

Basement Finishing vs. Basement Remodel: What’s the Difference?

If you’re thinking about doing something with your basement, you’ve probably come across both terms, “finishing” and “remodeling,” used loosely and often interchangeably. They’re not the same thing, and knowing the difference helps you have a more productive conversation with a contractor and understand what you’re actually asking for.

Here’s a clear breakdown of both, what they typically involve, and how to figure out which one your project actually is.

What Is Basement Finishing?

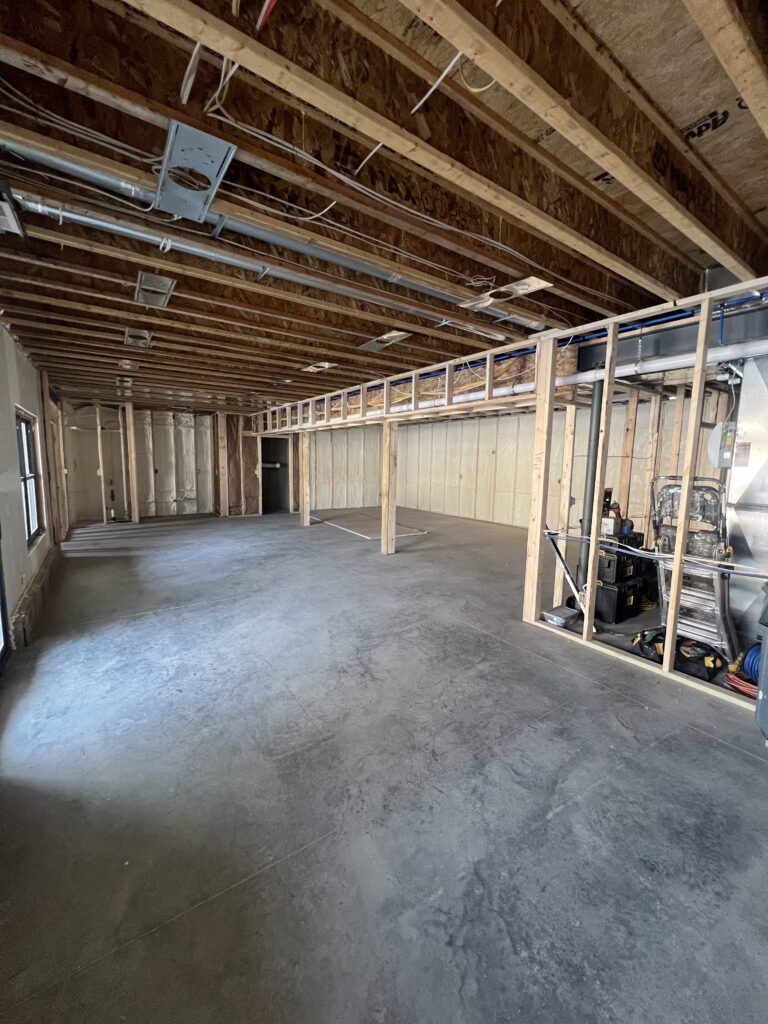
Basement finishing means taking an unfinished, raw basement and turning it into livable, usable space for the first time. Unfinished means exposed concrete walls and floors, visible joists overhead, a bare mechanical room with your HVAC, water heater, and electrical panel, functional but not habitable or comfortable.

Finishing that space involves framing interior walls, installing insulation, running electrical wiring and adding outlets and lighting circuits, adding HVAC supply and return runs to condition the space, drywalling and finishing walls and ceilings, installing flooring (luxury vinyl plank, carpet, and tile are all common choices for below-grade spaces), and adding doors, trim, and paint.

If your basement currently has none of that and you want it to function as a family room, home office, guest room, or playroom, what you’re describing is a basement finish.

What is Basement Remodeling?

A basement remodel means working with a space that’s already finished, already drywalled, floored, and functional, but changing it significantly. Maybe it was finished 20 years ago and everything feels dated. Maybe the layout doesn’t work for how your family uses the space now. Maybe you want to add a bathroom where there wasn’t one, or convert a storage area into a proper bedroom with egress.

Remodeling often involves removing and reconfiguring existing walls, updating electrical and lighting systems, adding or moving plumbing for a bathroom or wet bar, replacing flooring and finishes, and adding new features that weren’t there before, like built-ins, a bar area, or a home theater setup.

The distinction matters practically because a remodel often involves more demolition and more complexity than a finish. You’re undoing what’s already there before you can put in what you want. That typically affects timeline and scope, though not always in predictable ways. An old finish done cheaply can complicate things; a well-built one is easier to work with.

What About Adding a Bathroom?

Adding a bathroom to a basement, whether in a finishing project or a remodel, is one of the most common requests and one of the most impactful upgrades. In Columbus, older homes often have unfinished basements with no rough plumbing, which means adding a bath involves either breaking concrete to run new drain lines or using an above-floor macerating system.

Which approach makes sense depends on your existing plumbing configuration, your soil conditions, and your timeline. A contractor who does this work regularly in Columbus will have a clear read on what’s right for your specific basement, and it’s one of the questions worth asking during a consultation.

Is Your Basement Suitable for Finishing?

Before diving into design, it’s worth making sure the space is actually ready to be finished. A few things matter.

Moisture. Below-grade spaces are prone to water intrusion, and finishing over an active moisture problem traps it and leads to mold, damaged drywall, and ruined flooring. If you’ve had any standing water, active seepage, or visible efflorescence (white mineral deposits) on your concrete walls, that should be addressed before finishing begins.

Ceiling height. Columbus building code generally requires a minimum ceiling height for habitable basement space. Finished ceiling heights depend on what’s above: ductwork, beams, and joists all factor in. [NOTE: confirm Columbus minimum ceiling height requirement before publishing]

Egress. If a basement bedroom is part of the plan, code requires an egress window that meets minimum dimensions. That’s sometimes an add to the scope if the existing windows don’t qualify.

A walk-through with a contractor before you commit to a scope will surface any of these issues early.

Which One Do You Need?

Here’s a simple way to think about it. If your basement is raw concrete and exposed framing, you’re finishing it. If your basement is already drywalled and livable but you want to change or upgrade it, you’re remodeling it.

Either way, the goal is the same: usable, comfortable space that adds real function to your home and reflects how your family actually lives. DC Homes handles both, and the process starts with a free consultation where we look at the space, understand what you want, and give you a detailed, itemized estimate of what it’s going to take.

Frequently Asked Questions

Is basement finishing cheaper than a basement remodel?

Not necessarily, it depends entirely on scope. A full finish from scratch with a bathroom can cost more than a remodel that’s updating finishes and reconfiguring a layout. Scope and complexity drive cost, not the label. We provide detailed, itemized estimates so you know exactly what you’re getting.

Do I need a permit to finish my basement in Columbus?

Yes. Basement finishing involves electrical, framing, and often HVAC work, all of which require permits from the City of Columbus or your local municipality. DC Homes handles permit applications as part of the project.

How long does basement finishing take?

A standard basement finish typically runs six to ten weeks for active construction, depending on square footage and complexity. Adding a bathroom or a significant structural change extends that. The design and planning phase adds time before construction starts. We’ll give you a realistic timeline at the estimate stage.

What flooring works best in a basement?

Below-grade spaces need flooring that handles moisture and temperature variation. Luxury vinyl plank is one of the most popular and practical choices: durable, water-resistant, and available in styles that look genuinely good. Carpet works in areas with low moisture risk. Tile is a strong choice for bathrooms and utility areas. We’ll make recommendations based on your specific basement conditions.

Can I convert my basement into a legal bedroom?

Possibly, but it requires meeting egress and ceiling height requirements under Columbus building code. That often means adding an egress window if the existing ones don’t qualify. We’ll evaluate this during the consultation.

If you’re weighing what to do with your basement, the best starting point is a conversation about the space itself. Call DC Homes at (740) 827-3410 or request a free consultation at customdchomes.com. No pressure, just a real conversation about your basement and what’s possible.

Aging-in-Place Remodeling: How to Update a Columbus Home You Plan to Stay In

You love your house. You raised a family here, you know every creak in the floor, and you have no interest in leaving for a condo across town or a facility somewhere. The only thing standing between you and staying put for the long haul is that the house was built for a younger version of you, with the bedroom and laundry upstairs, a step-in tub, and doorways that feel narrower every year.

That’s exactly what aging-in-place remodeling is for. It’s updating a home so it keeps working for you as your needs change, ideally before a fall or a surgery forces the issue. For a lot of Columbus homeowners, especially in established suburbs where people put down roots decades ago, it’s the smartest remodeling money they’ll spend. Here’s how to think about it.

What is aging-in-place remodeling?

Aging in place means staying in your own home safely and comfortably as you get older, rather than moving to assisted living. Aging-in-place remodeling is the set of changes that makes that possible: removing the spots where falls happen, making everyday tasks easier on your body, and, where it makes sense, bringing the essentials of daily life onto one floor.

Done well, these updates don’t make a home look like a hospital. A curbless shower, wider doorways, and better lighting read as modern and clean to any guest. The goal is a home that quietly works better for you and would appeal to the next buyer too.

The aging-in-place changes that matter most

Not every modification is worth the same. These deliver the most safety and daily comfort per dollar in a typical Columbus home:

  • A curbless, walk-in shower. Stepping over a tub wall is one of the most common places people fall. A zero-threshold shower with a bench, a handheld sprayer, and slip-resistant tile is safer and looks great.
  • A main-floor full bathroom and bedroom. If everything you need is on one level, stairs stop being a daily risk. In a two-story home, creating a main-floor primary suite, by addition or by converting an underused room, is the single biggest quality-of-life upgrade.
  • Wider doorways and clear paths. Widening key doorways to 32–36 inches accommodates a walker or wheelchair now or later and just makes the house feel more open in the meantime.
  • Grab bars and blocking. Even if you don’t want bars yet, adding solid blocking inside the walls during a remodel means they can be installed later in minutes instead of opening up tile.
  • Lever handles and rocker switches. Easier on hands that don’t grip the way they used to, and a small cost when you’re already updating.
  • Better lighting and contrast. More light, especially at stairs, hallways, and the bathroom, plus contrast between floors and walls, prevents missteps. Underrated and inexpensive.
  • A no-step entry. At least one entrance without stairs, often via a gently graded walk or a low-profile threshold, keeps the house reachable on a bad day or with a future mobility device.

Should you do it all at once or in stages?

Either approach works, and the right one depends on your budget and timeline. Doing a bathroom and main-floor suite together is more disruptive but more cost-effective per dollar, since you’re only mobilizing a crew, pulling permits, and living through construction once. Phasing lets you spread cost over time, start with the highest-risk items, and add the rest later, which is why building in blocking and planning the layout up front pays off.

A good remodeler will help you sequence it around your life and your budget rather than selling you everything today. We’ll walk you through what’s urgent, what can wait, and how to set up the early phases so the later ones go smoothly.

Will aging-in-place updates hurt resale value?

This is a common worry, and the answer is reassuring: thoughtfully done, these updates tend to help. A curbless shower, a main-floor bedroom and bath, wider doorways, and better lighting are features that appeal broadly, not just to older buyers. Single-floor living is desirable to plenty of people. The trick is to design for accessibility and good taste at the same time, which a remodeler who does this work regularly knows how to do.

Frequently asked questions

At what age should you start aging-in-place remodeling? There’s no magic number. The best time is before you need it, while you can plan calmly rather than reacting to a fall or a hospital discharge. Many people start in their late 50s or 60s with small changes and a long-term plan.

Can you make an older Columbus home accessible? Yes. Older homes here often have narrower doorways, step-in tubs, and bedrooms upstairs, all of which can be addressed. Sometimes the cleanest solution is a small addition for a main-floor suite; other times it’s reworking existing rooms. A walkthrough will tell you which.

What’s the difference between aging in place and universal design? Universal design means building spaces usable by people of all ages and abilities from the start. Aging in place applies those same principles to help you stay in your home as you get older. In practice they overlap heavily.

Does insurance or Medicare pay for home modifications? Generally, standard Medicare doesn’t cover home remodeling, though some Medicare Advantage plans, VA benefits, or state programs may help with specific modifications. Check your specific plan and any local programs. [NOTE: confirm and avoid making coverage promises; this varies by individual.]

Do I need a permit for accessibility modifications? For structural work, moving walls, an addition, or significant plumbing and electrical changes, yes. Grab bars and fixture swaps usually don’t. A remodeler will handle the permitting for the work that requires it.

Let’s plan a home you can stay in

If you want to stay in your Columbus home for the long run, the best first step is a conversation about your house, your priorities, and your budget, followed by a clear, itemized estimate you can plan around. DC Homes has worked with Columbus-area homeowners since 2017, and we stay communicative and involved from the first estimate through the final walkthrough.

Call (740) 827-3410 or request a free quote for a no-pressure conversation. You can also explore our home additions and bathroom remodeling services, or get in touch.

Finished Basement Ideas for Columbus Homes

If your basement is currently home to a few storage bins, the furnace, and not much else, you’re sitting on some of the most usable square footage in your house. Finishing it is one of the best ways to gain a whole new room without building up or out. The hard part is deciding what that space should become, especially when a Columbus basement comes with a few realities a main-floor room doesn’t.

Below are finished basement ideas organized by how families actually use the space, plus the practical things worth planning for before the first stud goes up. Whether you have a sprawling walkout or a snug basement under an older Clintonville bungalow, there’s a smart way to put it to work.

Before the ideas: three things every Columbus basement needs to handle

A great basement starts below the surface. Plan for these first, and everything you build down there lasts.

  • Moisture. Central Ohio’s clay soil and freeze-thaw winters mean basements need to stay dry before they’re finished. That can involve grading, gutters and downspouts directed away from the house, and sometimes interior waterproofing or a sump pump. Finishing over a damp basement is the one shortcut that always comes back to bite.
  • Egress. If you want a bedroom down there, Ohio building code requires an egress window or door large enough to climb out of in an emergency. It’s a non-negotiable for a legal bedroom, and worth knowing before you frame walls.
  • Ceiling height and obstacles. Older Columbus homes often have lower basement ceilings and ductwork or beams running through them. A good plan works around these with soffits and smart layout rather than fighting them.

We walk every homeowner through these at the start, so the finished space is one you can actually enjoy without worrying about what’s behind the drywall.

Finished basement ideas by how you’ll use the space

A family room or media room

The most popular use, and for good reason. A finished basement makes a natural second living room: a place for movie nights, the big game, or the kids to spread out while the main floor stays calm. Plan for plenty of outlets, comfortable lighting in zones you can dim, and a layout that leaves room for a sectional without blocking the stairs.

A guest bedroom

A basement bedroom gives visiting family their own space and adds real flexibility to your home. The key detail is that egress window mentioned above, which also brings in natural light and makes the room feel less “basement.” Pair it with a closet and good insulation, and guests may never want to leave.

A full or half bathroom

Adding a bathroom turns a finished basement from a bonus room into a true living level. It also makes a basement bedroom or entertaining space far more practical. Where the bathroom can go often depends on where your existing plumbing runs, which is one of the first things we map out. If the basement sits below the sewer line, a setup with an up-flush or ejector system can still make it work.

A home gym

Basements are ideal for a home gym. They stay cool, they keep the noise of dropped weights away from the rest of the house, and the concrete floor below can handle the load. Look at rubber or luxury vinyl flooring, mirrors, solid lighting, and a little extra ventilation to keep the air fresh.

A kids’ playroom

Giving the toys a home of their own is reason enough to finish a basement. Durable flooring, built-in storage to corral the chaos, and a soft, bright color scheme make a playroom that works now and can grow into a teen hangout later. Rounded corners and good lighting go a long way for little ones.

A home office or studio

With more Columbus families working from home, a quiet basement office away from the daily traffic is a genuine upgrade. Prioritize lighting (a window well or larger egress window helps), a few dedicated circuits for equipment, and sound insulation in the ceiling so the footsteps overhead stay overhead.

An entertaining space or bar

If you love to host, a basement bar or lounge is a showpiece. A wet bar with a small sink and fridge, comfortable seating, and warm lighting turns the lower level into the spot everyone gathers. This pairs naturally with a media area and a half bath for a complete entertaining floor.

Small basement ideas

A smaller basement can still pull its weight. The trick is to let one zone do most of the work and use built-ins to keep it from feeling cramped. A combined family room and play area, an office tucked into a nook under the stairs, or a guest room with a Murphy bed all make a modest footprint feel generous. Light colors, recessed lighting, and flooring that runs in one continuous material help a small basement feel larger than it is.

Materials that hold up underground

Basements have their own rules when it comes to finishes. A few choices that earn their place:

  • Flooring: luxury vinyl plank, tile, or engineered options rated for below-grade installation handle the occasional bit of basement humidity better than solid hardwood.
  • Walls: moisture-resistant drywall and proper insulation keep things comfortable and help with sound.
  • Ceilings: a drop ceiling keeps access to plumbing and wiring, while a drywalled ceiling looks more finished. Each has its place depending on what runs overhead.

Choosing the right materials from the start is a big part of a basement that still looks great years from now.

Frequently asked questions

Can I add a bedroom in my basement? Yes, as long as it has a proper egress window or door that meets Ohio code, plus the right ceiling height. The egress is what makes it a legal, safe bedroom, so it’s the first thing to plan.

Do I need a permit to finish a basement in Columbus? Almost always, yes. Finishing a basement typically involves framing, electrical, and often plumbing, all of which require permits and inspections in Columbus and the surrounding suburbs. We handle that process so it’s done right.

Will a finished basement stay dry? It will if the moisture is managed before finishing. That means good exterior drainage, sealing where needed, and sometimes a sump pump. We always address water first so your finished space stays that way.

What’s the best flooring for a basement? Below-grade-rated luxury vinyl plank and tile are popular for good reason. They handle humidity and the occasional surprise far better than solid hardwood.

How long does it take to finish a basement? It depends on the size and whether you’re adding a bathroom or bedroom, but many basement projects run several weeks once the plan and permits are in place. We give you a realistic schedule up front.

Ready to put your Columbus basement to work?

The best basement ideas start with your home, your family, and how you actually want to use the space. If you’re in Columbus, Dublin, Powell, or anywhere nearby, reach out to DC Homes at (740) 827-3410 or request a consultation. We’ll talk through your space, flag anything worth handling first, and help you picture what’s possible. You can also see more of our basement finsihing to get inspired.

How Long Does a Kitchen Remodel Take? A Columbus Homeowner’s Timeline

If you’re planning a kitchen remodel, one of the first questions on your mind is probably how long you’ll be living without a working kitchen. It’s a fair thing to want to know before the first cabinet ever comes off the wall. Knowing the timeline ahead of time makes the whole project feel a lot less daunting, and it helps you plan around holidays, school schedules, and everyday life in your Columbus home.

Here’s the honest answer up front: most full kitchen remodels take about 6 to 12 weeks of on-site work, with a few weeks of planning and ordering before that. A smaller, simpler update can wrap up faster. A larger project that moves walls or reworks the layout can run longer. Below, we’ll walk you through where that time actually goes, what tends to stretch a timeline, and how a clear plan keeps your remodel on track.

The short answer: how long a kitchen remodel takes

For a typical Columbus kitchen, plan on roughly:

  • 2 to 4 weeks of design, selections, and ordering before any demolition begins.
  • 6 to 12 weeks of construction once the work starts.

So from your first design meeting to the day you cook your first dinner, a full kitchen remodel often spans two to four months. That window depends heavily on the size of the kitchen, how much is changing, and how quickly materials arrive. The single biggest factor most homeowners don’t expect is lead time on cabinets, which we’ll get to in a minute.

The phases of a kitchen remodel timeline

A remodel feels less mysterious once you can see the stages it moves through. Here’s how the time usually breaks down.

Design and selections (2 to 4 weeks). This is where you settle the layout, cabinets, countertops, flooring, fixtures, and finishes. Taking your time here actually saves time later, because changing your mind after materials are ordered is what throws schedules off.

Ordering and lead times (runs in the background). Once selections are final, materials get ordered. Custom or semi-custom cabinets are the usual long pole, sometimes arriving several weeks to a couple of months out. A good builder orders early and schedules demolition around when materials will actually be on site, so your kitchen isn’t sitting torn apart waiting on a delivery.

Demolition (a few days). Out come the old cabinets, counters, flooring, and sometimes a wall. This part moves quickly and is oddly satisfying to watch.

Rough-in work (1 to 2 weeks). Any plumbing, electrical, and HVAC changes happen now, while walls are open. In older Columbus homes, this is often where a crew finds things worth addressing, like outdated wiring or plumbing that isn’t up to current code.

Inspections and permits (varies). Columbus and the surrounding suburbs require permits for most kitchen remodels that touch plumbing, electrical, or structure. Inspections have to pass before walls get closed back up, so this step is built into the schedule rather than rushed.

Cabinets, counters, and finishes (3 to 5 weeks). Cabinets go in, then countertops are measured and installed (stone counters are usually templated after cabinets are set, which adds a short wait). Backsplash, flooring, paint, lighting, and hardware follow.

Final details and walk-through (a few days). Punch-list items, a thorough cleanup, and a walk-through together so every detail is right before we call it done.

What makes a kitchen remodel take longer

A few things reliably stretch a timeline. None of them are surprises if you plan for them.

  • Custom cabinet lead times. The most common reason a start date sits further out. Ordering early is the fix.
  • Layout changes and moved walls. Relocating plumbing or removing a load-bearing wall (a wall that helps hold up the house) adds engineering, framing, and inspection time.
  • Older-home surprises. Columbus has a lot of beautiful older homes, and opening up walls can reveal knob-and-tube wiring, old plumbing, or past water damage that’s worth fixing while everything is accessible.
  • Mid-project changes. Deciding on a different counter or layout after work is underway means reordering and rescheduling. Settling selections early keeps things moving.
  • Permit and inspection scheduling. Necessary and worth doing right; just build it into the plan.

How long will you be without a working kitchen?

For most full remodels, plan on being without a usable kitchen for 4 to 8 weeks in the middle of the project, roughly from demolition through counter installation. Many homeowners set up a temporary kitchen with a microwave, a coffee maker, and a folding table in another room. If your remodel keeps the existing footprint and finishes are straightforward, that stretch is shorter. Knowing the window in advance is half the battle, and it’s something we map out with you before the first day.

How a clear plan keeps your kitchen remodel on schedule

Most of the horror stories you hear about remodels dragging on come down to two things: starting before the plan was truly finished, and a contractor who went quiet. At DC Homes, we work the opposite way. We lock in your selections and order materials before demolition starts, give you a realistic schedule from the beginning, and keep you updated as the project moves, so you always know what’s happening and what’s next. That “say what we’ll do, then do it” approach is the whole reason homeowners across Columbus, Dublin, Powell, and Upper Arlington keep calling us back. You can see examples of our work on our kitchen remodeling page.

Frequently asked questions

How long does a small kitchen remodel take? A smaller update that keeps the existing layout and uses stock or quick-ship materials can often be done in about 3 to 5 weeks of on-site work, once materials are in hand.

How long does a full kitchen remodel take? A full remodel with new cabinets, counters, flooring, and finishes typically runs 6 to 12 weeks of construction, plus a few weeks of design and ordering beforehand.

Can you speed up a kitchen remodel? The best way to keep things fast is to finalize all your selections early and order materials before demolition. Choosing quick-ship cabinets instead of fully custom can also shorten the wait.

Do I need to move out during a kitchen remodel? Almost never. Most homeowners stay home and set up a small temporary kitchen elsewhere in the house for the few weeks the kitchen is out of commission.

Will an older Columbus home take longer to remodel? Sometimes, yes. Older homes occasionally need wiring or plumbing brought up to code once walls are open. It’s worth doing while everything is accessible, and a good builder will flag it early rather than spring it on you.

Thinking about a kitchen remodel in Columbus?

Every kitchen is a little different, and the best way to get a timeline for your home is a real conversation about your space and what you want to change. If you’re in Columbus or the surrounding suburbs, reach out to DC Homes at (740) 827-3410 or request a consultation. We’ll walk you through what to expect, start to finish, with no surprises along the way.

The Most Common Foundation Repair Methods and Which Ones Are Right for Columbus Homes

If your doors are sticking, your floors feel off, or you’re noticing cracks running along your walls, Columbus’s soil may already be working against your foundation. Here’s what to actually do about it.

Why Columbus Homes Face More Foundation Trouble Than Most

You bought your home. You maintain it. But under the surface, something has been shifting for years, and Ohio soil is a big reason why.

Foundation repair methods vary widely, but choosing the right one starts with understanding why foundations fail in the first place. Columbus has a blend of soil types including loam, silt, and a significant amount of clay. That clay is the primary troublemaker. It expands when wet and contracts as it dries, constantly pushing and pulling on foundations. With Central Ohio’s climate, freezing and thawing are a regular part of the year. When water in the soil freezes, it expands and pushes upward on foundation slabs. Then, as it melts, the soil shrinks, sometimes leaving voids. 

Columbus also sits in a humid continental climate with more than 40 inches of average rainfall every year. Silt and clay soils cannot always handle this much water, and the instability means the underlying soil cannot provide adequate support, leading to detrimental foundation damage. 

That’s the environment your home is dealing with every season. Understanding it is what separates an informed repair decision from one you’ll regret.

Warning Signs That Your Foundation Needs Attention

Before diving into foundation repair methods, it helps to know what to look for. Many Columbus homeowners dismiss early signs as routine house aging. They’re often not.

Common warning signs that something structural is happening:

  • Stair-step cracks running diagonally across brick or block walls
  • Doors and windows that stick, no longer close flush, or have visible gaps around the frame
  • Uneven or sloping floors, especially in basements and ground-level rooms
  • Vertical or diagonal cracks in basement walls
  • Gaps forming between interior walls and the ceiling or floor
  • Floors that feel springy or soft underfoot
  • Visible separation between the foundation and exterior brick veneer

Common signs of foundation settlement include floor cracks, stair-step cracks in walls, cracks in interior drywall, and windows and doors that are difficult to open and close. Foundations usually settle unevenly, causing damage to walls and floors that can lead to failure if not addressed. 

Catching these early matters. The longer settlement progresses, the more involved the repair.

The Most Common Foundation Repair Methods Explained

Push Piers (Steel Resistance Piers)

Push piers are one of the most widely used solutions for foundations experiencing settlement, and for good reason. They reach deep and they hold.

Push piers are hydraulically driven pier systems consisting of sections of galvanized or epoxy-coated steel pipe. The piers are point-bearing and driven with a hydraulic ram through unstable soils to rock or load-bearing strata. Once driven to a suitable bearing layer, hydraulic jacks attach to the embedded steel piers and are used to raise the foundation back to its original elevation. 

The process uses your home’s own weight as resistance to drive the piers down. That makes push piers particularly well suited for heavier structures with full basements, which describes a large portion of older Columbus homes.

Push piers work best for:

  • Homes with full basements or deep footings
  • Moderate to severe settlement
  • Situations where bedrock or stable strata can be reached

Helical Piers (Screw Piles)

Helical piers function on a similar principle to push piers but use a different installation method. Think of them as giant structural screws.

Helical piers are installed using hydraulic equipment and are ideal for unstable topsoil or areas with high groundwater levels. Multiple bearing plates contact the soil across more surface area for greater stability. Each pier is load-tested and precisely configured for your exact soil requirements. Helical piers can be loaded immediately after installation with no cure time required. 

As a general rule, helical piers will work regardless of the weight of the structure and in most soil conditions. Push piers may begin to lift the structure prior to advancing the pier to suitable strata if there is not enough weight behind the structure. If there is a basement or frost foundation, push piers will generally work fine. For shallow footings or thickened edge slabs, helical piers may be the better option. 

Helical piers work best for:

  • Lighter structures, additions, porches, and garage slabs
  • Homes with shallower footings
  • Tight or restricted access areas where large equipment can’t reach
  • Situations where immediate load-bearing is needed without cure time

Mudjacking (Slabjacking)

Mudjacking is a simpler, faster approach designed specifically for concrete slabs that have sunken or become uneven. It doesn’t address deep structural settlement the same way piering does, but for the right situation, it’s highly effective.

The process involves drilling small holes through the settled slab, then pumping a cement slurry or polyurethane foam beneath it to fill voids and lift the concrete back into position.

Mudjacking is a much simpler process that requires very little excavation if any. Experts drill holes into the foundation to create pathways for concrete or polyurethane to be pumped in, filling empty spaces beneath the foundation and providing lift to return the slab to its proper level. 

Mudjacking works best for:

  • Sunken driveways, sidewalks, patios, and garage floors
  • Concrete steps that have shifted
  • Slabs that have settled due to soil erosion rather than structural failure

The limitation is durability over time. If the underlying soil continues to shift, the slab may settle again.

Carbon Fiber Straps and Wall Anchors

Not every foundation problem involves sinking. Some Columbus homes develop bowing or buckling basement walls, a direct result of the lateral pressure that expansive clay soil creates against foundation walls after heavy rains.

Backfill soil absorbs more water and expands more than undisturbed soils, exerting pressure against the foundation. Since foundation walls are designed to support loads from above rather than lateral loads, expanding soil can cause foundation walls to crack, bow, and push inward. Expansive clays, hydrostatic pressure, and freezing water can create too much stress on basement walls, causing them to eventually push inward. 

Carbon fiber straps attach vertically to bowing walls and anchor into the floor and ceiling to stop inward movement. Wall anchors are an alternative that involves driving a plate into stable soil away from the foundation and connecting it via a steel rod to an interior plate, allowing periodic tightening over time to gradually straighten the wall.

Wall repair methods work best for:

  • Basement walls bowing inward but still structurally intact
  • Horizontal cracking along block or poured concrete walls
  • Early-stage wall movement where straightening is still possible

Drainage Correction and Waterproofing

Sometimes the most important foundation repair isn’t structural at all. Water management is the root cause of many Columbus foundation problems, and correcting drainage around a home can stop ongoing damage before it requires piering.

Interior drains, sump pumps, exterior grading corrections, and downspout extensions all reduce hydrostatic pressure against foundation walls. These are often combined with structural repairs rather than used alone.

Matching the Repair to the Problem: A Columbus Perspective

Columbus’s clay-heavy soil and wet winters mean that the most common scenarios contractors see in this market tend to involve settlement from saturated, shifting soil rather than simple erosion. That puts push piers and helical piers at the top of the list for serious structural work.

Concrete driveways, garage slabs, and back patios around Columbus homes are also frequent candidates for mudjacking because freeze-thaw cycles undermine the soil beneath concrete surfaces repeatedly over time.

For homes built in the 1960s through 1980s, which make up a large share of Columbus’s housing stock, basement wall bowing is a consistent issue that carbon fiber straps address well when caught early enough.

The wrong repair for the problem is a real risk. Applying mudjacking to a deeply settled basement rather than piering, for example, is a temporary fix that delays a more significant repair while allowing damage to progress.

FAQs About Foundation Repair Methods

1. How do I know if my foundation problem is structural or cosmetic?

Hairline cracks that run vertically in poured concrete and remain consistent in width over time are often settling cracks that don’t indicate structural failure. Horizontal cracks in block walls, stair-step cracks in brick, and diagonal cracks at corners of window or door frames are more concerning and warrant a professional evaluation. Any crack that is wider than a quarter inch or appears to be growing deserves immediate attention.

2. Can foundation repairs be done while the house is occupied?

In most cases, yes. Push piers, helical piers, and carbon fiber straps are installed without major interior disruption, and most homeowners continue living in the home during the process. Mudjacking is even less disruptive and typically takes a single day per project area. Major excavation work around the exterior may require clearing landscaping or temporary access restrictions.

3. How long do foundation repairs last?

Pier systems installed to stable bearing soil or bedrock are designed as permanent solutions. Professionally installed solutions are more reliable and longer lasting, and every properly installed foundation repair product is designed as a permanent solution to protect a home for the life of the structure. Mudjacking has a shorter lifespan and may require retreatment if the soil continues to shift. 

4. Will foundation repair affect my home’s resale value in Columbus?

Unrepaired foundation problems typically reduce resale value significantly and create complications during inspections and appraisals. A professionally completed and documented repair, on the other hand, demonstrates that the issue has been addressed properly. Many buyers view a repaired foundation with documentation as less of a concern than discovering an unknown problem during inspection.

5. Do I need a permit for foundation repair in Columbus?

The Ohio Building Code governs structural work, and certain types of foundation repair, particularly those involving excavation or structural reinforcement, may require permits depending on the scope of work. State and local building departments require permits before constructing or structurally modifying foundations, and require bearing capacity analysis as part of the permit process. A licensed contractor familiar with Columbus permitting requirements will handle this as part of the project. 

What DC Homes Brings to Foundation and Renovation Work in Columbus

Foundation problems have a way of surfacing exactly when you’re in the middle of something else, a kitchen remodel, a basement finish, a bathroom update. When the scope of a renovation reveals structural concerns, you want a contractor who knows how to handle both.

At DC Homes, we work with Columbus homeowners on renovation and remodeling projects that account for the full condition of the home. We understand how Columbus’s clay soil and seasonal cycles affect older homes, and we know how to coordinate structural repairs with the broader renovation work so your project moves forward cleanly.

Whether you’re dealing with an aging foundation alongside a planned remodel or you’ve spotted warning signs and want a professional assessment before committing to a project, we’re here to help you sort through it. The best foundation repair methods for your home depend on what’s actually happening under it, and getting that right from the start protects everything you put into the renovation above.

Contact DC Homes today to schedule a consultation for your Columbus home. We’ll take a thorough look, give you a straight answer on what we see, and help you figure out the right path forward.